How to Thin Out a Wig: Full 7 Steps Guide

How to Thin Out a Wig

Are you tired of wearing a wig that feels too thick and heavy? Don’t worry, you can easily thin it out and achieve a more natural look.

In this step-by-step guide, we’ll show you how to thin out a wig like a pro. From choosing the right tools to expert techniques, you’ll learn everything you need to know to transform your wig into a lightweight and comfortable masterpiece.

Get ready to unleash your wig’s true power!

Should you thin out your wig

How to Thin Out a Wig

Should you thin out your wig for a more natural look? Absolutely.

Thinning out your wig can make a significant difference in its appearance, giving it a more realistic and authentic look. By reducing the density of the hair, you can achieve a natural movement and flow that mimics real hair.

Thinning out a wig also helps to eliminate bulkiness, making it more comfortable to wear while enhancing its overall aesthetic. It allows for better styling options, as the hair becomes more manageable and easier to work with.

Thinning out your wig is a simple process that can be done at home with the right tools and techniques. So, if you desire a powerful and natural look, thinning out your wig is definitely worth considering.


How to thin out a wig

To thin out a wig, start by preparing it by detangling and combing the hair.

Then, identify the areas that need thinning and gently comb through those sections.

Next, using a pair of thinning shears or a razor comb, carefully thin out the hair by cutting small sections at a time.

Step 1: Prepare Your Wig

You can start thinning out your wig by gently combing through the strands to remove any tangles or knots. This step is crucial to ensure that the hair is evenly distributed and ready for thinning.

Once you have removed all the tangles, take a sharp pair of scissors and start cutting small sections of hair at a time. Hold the hair between your fingers and cut at an angle, taking care not to cut too much at once.

Gradually, work your way through the wig, focusing on areas where you want to achieve a thinner look. Remember, precision is key in achieving the desired result. Take your time and assess the hair after each cut to ensure that you achieve the perfect balance of volume and thickness.

Step 2: Identify the Areas That Need Thinning

Once you have combed through the strands, use your fingers to identify the areas where the wig needs thinning. Thinning out a wig can be a crucial step in achieving a natural and realistic look.

Here are three key areas to focus on when identifying where to thin out your wig:

  • The crown: This is the top area of the wig where hair tends to be thicker. Thinning out the crown will create a more realistic hairline and prevent the wig from looking bulky.
  • The sides: Pay attention to the sides of the wig, as this is where excess hair can often be found. Thinning out the sides will add dimension and prevent the wig from appearing too dense.
  • The nape: The hair at the nape of the wig may need thinning to create a seamless and natural transition between the wig and your own hair.

Step 3: Comb the Hair

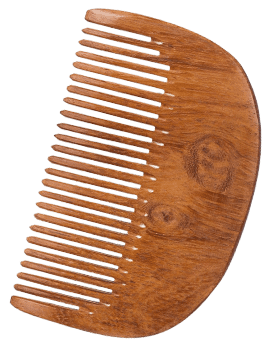
Start by gently combing through the hair of the wig to detangle any knots or snarls. This step is crucial in preparing the wig for thinning. Using a wide-toothed comb, work your way through the hair strands, starting from the ends and moving upwards towards the roots. Be patient and avoid pulling or tugging on the hair, as this can damage the wig.

Step 4: Start Thinning the Hair

Gently and consistently comb through the hair, making sure to avoid any tangles, as you begin thinning the hair in step 4 of the process. Thinning out a wig can provide a more natural and realistic look, giving you that extra boost of confidence.

To achieve this, follow these expert tips:

  • Use thinning shears: These specialized scissors have teeth-like notches that remove bulk without cutting the hair completely.
  • Work in sections: Divide the hair into manageable sections, and thin each section individually for better control and precision.
  • Start from the bottom: Begin thinning from the bottom layers and gradually work your way up, ensuring an even distribution of hair thickness.

By following these steps, you can achieve a beautifully thinned-out wig that looks effortlessly stunning and empowering.

Step 5: Blend the Hair

To achieve a seamlessly blended look, use a comb to gently run through the hair and blend the thinned sections together. This step is crucial in creating a natural and powerful appearance for your wig.

Start by holding the comb at a slight angle and comb through the thinned sections, ensuring that the hair is evenly distributed. Apply gentle pressure as you comb, being careful not to tug or pull on the hair.

As you blend, pay attention to any noticeable lines or unevenness in the hair. By running the comb through the thinned sections, you’ll create a smooth and cohesive look that seamlessly blends the natural hair with the thinned areas.

This technique will give your wig a polished and professional finish, exuding confidence and power.

Step 6: Repeat the Process

You can continue thinning out the wig by repeating the process, using a comb and blending the hair to achieve a natural look. Thinning out a wig can be a powerful way to enhance your style and create a more personalized look.

Here are three key steps to help you successfully thin out your wig:

  • Step 1: Assess the thickness: Take a close look at your wig and determine how much thickness you want to remove. This will help you decide how many times you need to repeat the thinning process.
  • Step 2: Use a comb: Start by combing through the wig, focusing on the areas where you want to thin out the hair. Use the comb to gently remove excess strands and create a more even distribution.
  • Step 3: Blend for natural look: After each round of thinning, take the time to blend the hair by gently combing through it. This will help create a seamless, natural look that matches your desired style.

Step 7: Check the Wig

Take a quick glance at the wig to ensure that you have achieved the desired thinness. This is a crucial step in thinning out a wig, as it allows you to assess the results of your efforts.

Look for any areas that may still appear bulky or uneven, and make any necessary adjustments. Use a comb or your fingers to run through the wig, feeling for any areas that may need further thinning.

If you find any, carefully trim away additional hair until the desired thinness is achieved. Remember to take your time and be cautious, as you don’t want to overthin the wig.

Frequently Asked Questions

How Often Should You Thin Out a Wig?

You should thin out a wig when it starts to look too thick or heavy. This will help it look more natural and comfortable to wear. Thinning out your wig will give it a fresh and stylish look.

Can You Thin Out a Synthetic Wig or Is It Only Possible With Human Hair Wigs?

Yes, you can thin out a synthetic wig as well as a human hair wig. Thinning out a wig is a process that involves removing excess hair to achieve a more natural and realistic look.

To thin out a wig, you can use specific tools and techniques. These recommendations vary based on the type of wig, whether it’s synthetic or human hair. It’s important to follow a step-by-step guide for best results.

Is It Possible to Thin Out a Wig Without Damaging It?

You can thin out a wig without damaging it by using the appropriate tools and techniques. It requires careful handling and precision to achieve the desired result without compromising the wig’s integrity.

Can You Thin Out a Wig if It Has Already Been Styled or Cut?

Yes, you can thin out a wig even if it has already been styled or cut. By following the proper steps and using the right tools, you can achieve a thinner and more natural look.

Conclusion

Thinning out a wig can be a simple and effective way to achieve a more natural and realistic look. By following the step-by-step guide provided, you can confidently thin out your wig and customize it to your desired style.

Remember to proceed with caution and take your time to ensure a flawless outcome. With the right technique and a little patience, you can transform your wig into a beautiful and personalized accessory.

Share:

Swarnali Ghosh

Swarnali Ghosh is the Co-Founder at AWE Hair International, a revolutionary beauty brand that has transformed the haircare industry. Her expertise in hair care is built on a foundation of extensive knowledge, hands-on experience, and a relentless pursuit of excellence. Swarnali honed her expertise in cosmetology, delving into the nuances of hair textures, scalp health, and the impact of various ingredients on hair health. Her insightful writings on haircare trends have been featured in leading beauty publications like SheFinds.com, LevikesWick.com, PrettyProgressive.com and many more.